How to Backup Windows Image to a USB Drive: Resolving 'The Drive Is Not a Valid Backup Location' Error
Introduction:
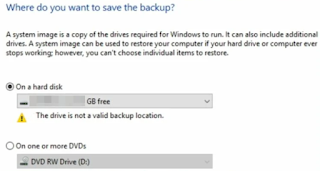
Backing up your Windows image is crucial for protecting your system and data in case of unexpected events. Creating a system image and storing it on an external drive is a popular method. However, many users encounter frustrating errors like "The Drive Is Not a Valid Backup Location" when attempting to use a USB drive, even if it's formatted with NTFS. In this blog post, we will explore a solution to this problem by sharing the USB drive as a network drive. By following these steps, you can successfully backup your Windows image without any hiccups.
Step 1: Access Disk Management
To begin, right-click on the Start Menu and select Disk Management from the options.
Step 2: Locate and Configure the USB Drive
Find your USB drive in the Disk Management window, right-click on it, and select Properties. Then, navigate to the Sharing tab and click on Advanced Sharing.
Step 3: Enable Sharing and Set Permissions
Check the "Share this folder" option and click on the Permissions button. In the Group or user names section, select Everyone and grant Full Control permissions. This ensures that the USB drive is accessible as a network drive.
Step 4: Obtain the IPV4 Address
Open a Command Prompt with administrative privileges by hitting the Windows key, typing "cmd," and selecting "Run as administrator." Type "ipconfig" and press Enter. Note down the IPV4 address as you will need it later.
Step 5: Access Control Panel
Click on the Start Menu icon, type "Control Panel" in the search bar, and open it.
Step 6: Navigate to Backup and Restore
In the Control Panel, locate and click on the "Backup and Restore" option.
Step 7: Create a System Image
Select the "Create a system image" option from the available choices.
Step 8: Choose Network Location
Select the "On a network location" option and click on the "Select" button.
Step 9: Enter Network Location Details
Enter the IPV4 address obtained earlier in the Network Location field. If required, provide your login credentials. If you don't remember your credentials, you can use "guest" as both the username and password.
Step 10: Select Backup Drive
Click "Next" and choose the backup drive where you want to store the system image.
Conclusion:
By following these steps, you can bypass the frustrating error message "The Drive Is Not a Valid Backup Location" when trying to backup your Windows image to a USB drive. Sharing the USB drive as a network drive allows you to overcome this obstacle and successfully create a system image. Remember to always have regular backups of your system to ensure the safety of your data. With this solution in your arsenal, you can confidently protect your Windows system and avoid any potential data loss.


